
Getting Started: Cloud Notebooks#
Before you can use relationalai, ensure that your Snowflake account administrator has:
- Installed the RelationalAI Native App from the Snowflake Marketplace.
- Granted your Snowflake user the
app_userapplication role.
See the Native App Installation guide for details.
You can use RelationalAI in cloud notebook environments like Snowflake, Google Colab or Hex. Click on the tabs below to see the instructions for each cloud notebook environment.
Install RAI#
Container Notebooks#
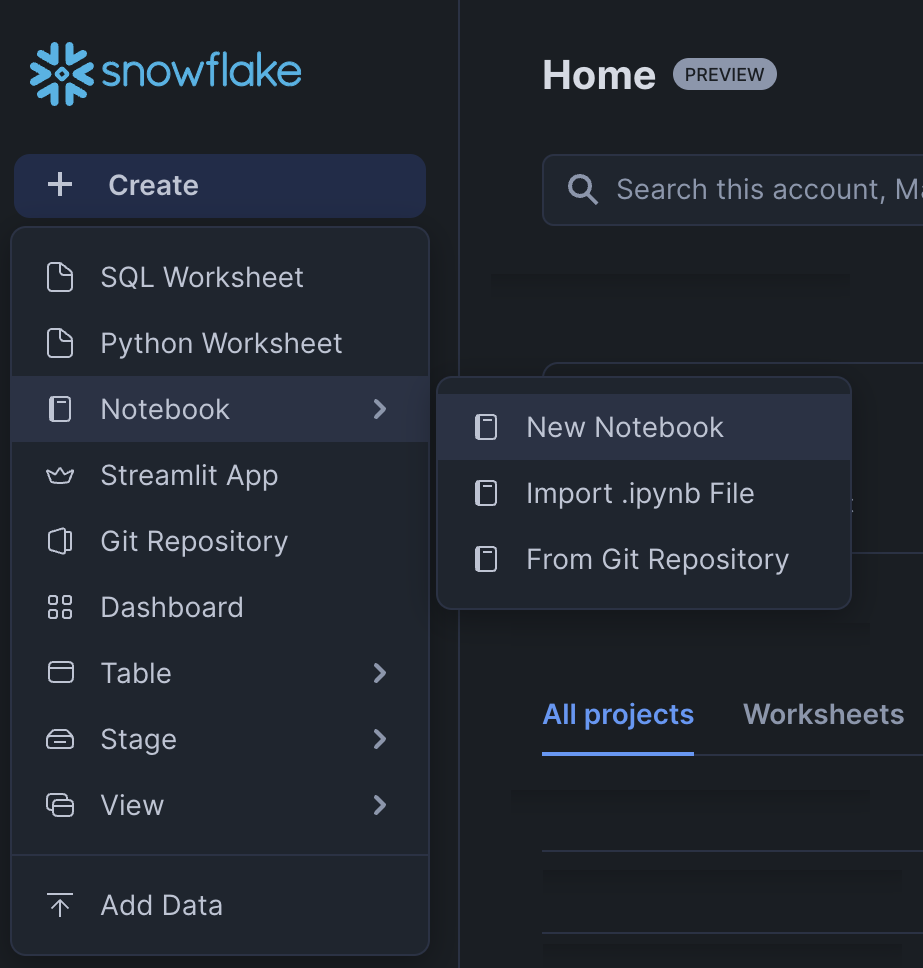
To create a new Snowflake Container Notebook, navigate to New Notebook from the Snowsight home page:
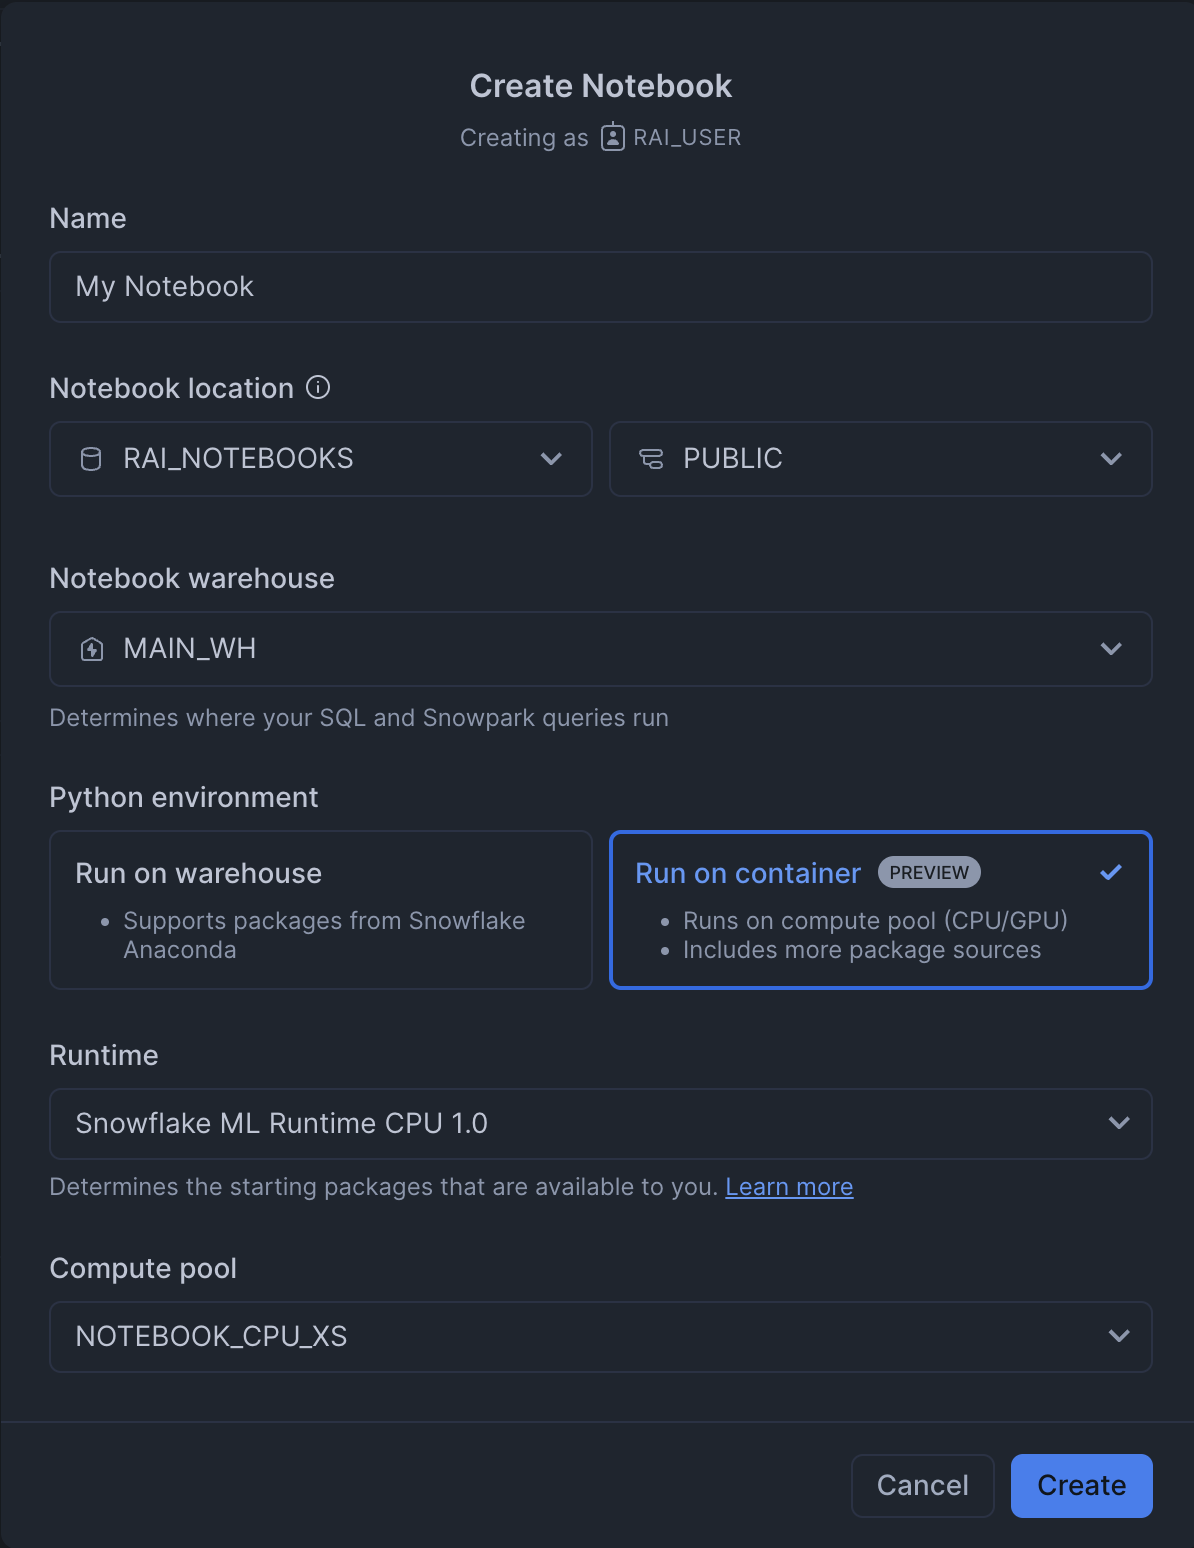
Choose a database and a warehouse and select the Run on container option:
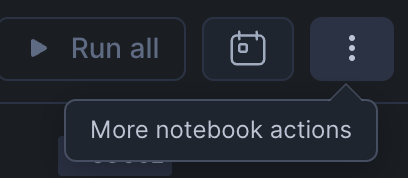
Click the triple-dot icon (⋮) in the top right corner of the notebook to open a modal:
In the modal that pops up, enable the PyPI integration:
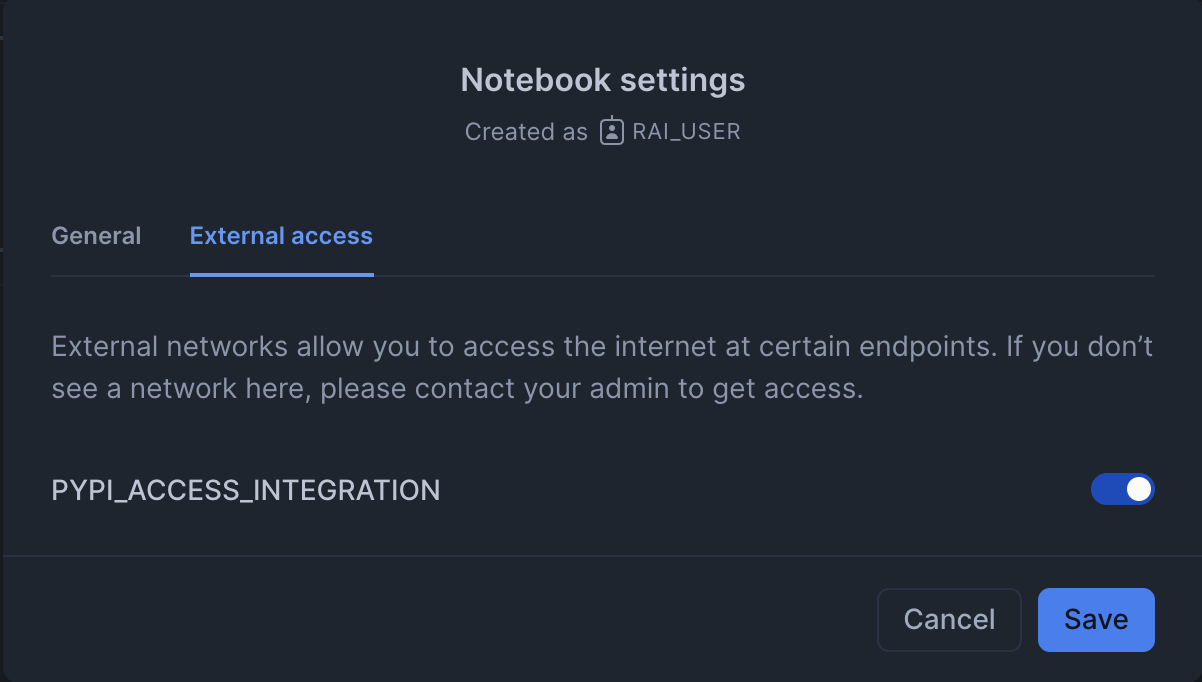
If you don’t see the PyPI integration option, ensure that the commands in the Installation Notebook were run by an account administrator.
To install the RelationalAI library, run the following shell command in the first cell of the notebook:
#%pip install relationalai
Warehouse Notebooks#
Follow these steps to install the RelationalAI (RAI) Python package for use in a Snowflake notebook environment with the Run on warehouse option:
- Choose Notebook settings from the triple-dot (⋮) dropdown in the top-right corner of the Snowflake Notebooks window and switch to the External access tab.
Turn on the
S3_RAI_INTERNAL_BUCKET_EGRESS_INTEGRATIONtoggle. This allows your notebook to access data from the RAI Native App. - Upload the RAI Python library as a ZIP file into your notebook filesystem. You can download the ZIP file here.
- Run the following code to make the packages in the ZIP file visible to the Python interpreter:
#import sys
sys.path.append("./relationalai.zip")
Test Your Installation#
Verify that the relationalai package is installed and working correctly by running the following code:
#import relationalai as rai

# Create a model named "MyFirstModel".
model = rai.Model("MyFirstModel")

# Send a test query.
with model.query() as select:
    response = select(1 + 1)

# The results are stored as a pandas DataFrame in the response.results attribute.
print(response.results)
#    v
# 0  2
Install RelationalAI#
Begin by installing relationalai from PyPI by pasting the following code into the first cell and doing shift+enter to run it:
#%pip install relationalai
Note that the exclamation mark ! marks the command as a shell command in Colab.
Setup Your Snowflake Connection#
Click on the key icon in the left sidebar to open the user secrets editor.
Add your password with the key snowflake_password.
Then, fill in the following code snippet with your Snowflake account details and execute it to create a RAI model and connect to your Snowflake account:
#import relationalai as rai

from google.colab import userdata

rai.save_config(f"""
    account = "<SNOWFLAKE_ACCOUNT>"
    user = "<SNOWFLAKE_USER>"
    password = {userdata.get('snowflake_password')}
    role = "<SNOWFLAKE_ROLE>"
    warehouse = "<SNOWFLAKE_WAREHOUSE>"
""")
Test Your Installation#
Verify that the relationalai package is installed and working correctly by running the following code:
## Create a model named "MyFirstModel."
model = rai.Model("MyFirstModel")

# Send a test query.
with model.query() as select:
   response = select(1 + 1)

# The results are stores as a pandas DataFrame in the response.results attribute.
print(response.results)
#    v
# 0  2
Install RelationalAI#
Run the following command in a Python cell in a Hex notebook to install the relationalai package:
#%pip install relationalai snowflake-connector-python==3.11.0
If you omit snowflake-connector-python==3.11.0, then pip install will upgrade the package to the latest version, causing incompatibilities with Hex’s libraries.
Setup Your Snowflake Connection#
Using Hex’s Snowflake Integration#
If you have connected to your Snowflake account from Hex and enabled Snowpark, you can use the hextoolkit module to obtain a session object and use it to create a model object:
#import relationalai as rai
import hextoolkit

hex_snowflake_conn = hextoolkit.get_data_connection("<Your Snowflake Connection Name>")
hex_snowpark_session = hex_snowflake_conn.get_snowpark_session()

model = rai.Model("MyFirstModel", connection=hex_snowpark_session)
Connecting to Snowflake from Python#
Alternatively, you can connect to Snowflake from Python using the relationalai package:
Click on the Variables menu item in the left sidebar. Enter your Snowflake password as a secret. Paste the code below and fill in your account details:
#import relationalai as rai

rai.save_config(f"""
    account = "<SNOWFLAKE_ACCOUNT>"
    user = "<SNOWFLAKE_USER>"
    password = {snowflake_password}
    role = "<SNOWFLAKE_ROLE>"
    warehouse = "<SNOWFLAKE_WAREHOUSE>"
""")
Test Your Installation#
Verify that the relationalai package is installed and working correctly by running the following code:
## Create a model named "MyFirstModel."
model = rai.Model("MyFirstModel")

# Send a test query.
with model.query() as select:
   response = select(1 + 1)

# The results are stores as a pandas DataFrame in the response.results attribute.
print(response.results)
#    v
# 0  2
The first time you query a model, a RAI engine is created for you. Engines are RAI Native App compute resources similar to Snowflake warehouses that evaluate queries from RAI models. Note that it may take several minutes to create your engine.
You may change which engine is used or created by setting the engine configuration key to the name of your engine in the save_config() function used to configure your Snowflake connection.
See the Configuration guide for more information.
Next Steps#
Check out the Tutorial to learn how to create a model step-by-step using the RAI Python API.